
How To DIY Chairs And Loungers For Your Portable Bathtub
Have you ever longed for extra comfort in your portable bathtub? Imagine enhancing your bathing experience with custom-made chairs and loungers tailored just for you.
Do you ever wish your portable bathtub had a bit more pizzazz or perhaps some added privacy?
Well, you’re in luck! Crafting a DIY cover for your portable bathtub is not only a fun weekend project but also a great way to add a personal touch to your bathing experience.
In this guide, we’ll walk you through the process of making a custom cover that’s both stylish and functional. Let’s dive in!
Creating the perfect cover starts with a solid plan. You need to consider the dimensions, style, and material of your portable bathtub cover. This stage is all about setting a strong foundation for your DIY project.
Getting the measurements right is crucial. Start by measuring the length, width, and height of your portable bathtub.
Don’t forget any curves or unique features that might affect the cover’s design. Take these measurements twice to ensure accuracy.
After all, the success of your project hinges on these numbers.
A well-fitting cover not only looks better but also functions more effectively, keeping water and heat in, and ensuring a comfortable, private bathing experience.
What’s your vision for this cover? Do you want something sleek and minimalistic, or are you leaning towards a more elaborate design with pockets and handles?
Think about how you use your portable bathtub and what features would enhance your experience.
For example, a cover with a built-in cushion could make your baths more comfortable, while side pockets could hold bath essentials. Your design should reflect not just your style but also your practical needs.
The material you choose for your portable bathtub cover must balance aesthetics with functionality. Waterproof or water-resistant materials like nylon or PVC are practical choices, but you can also explore outdoor fabrics for a more stylish look.
Consider the texture, color, and how easy it is to clean the fabric. Remember, your cover will be exposed to water and humidity, so it should withstand these conditions while still complementing your bathroom’s decor.
With your design in place, it’s time to gather your tools and create a template. This preparation will streamline your crafting process, making it more enjoyable and less of a chore.
Having the right tools on hand will make your DIY project smoother and more efficient.
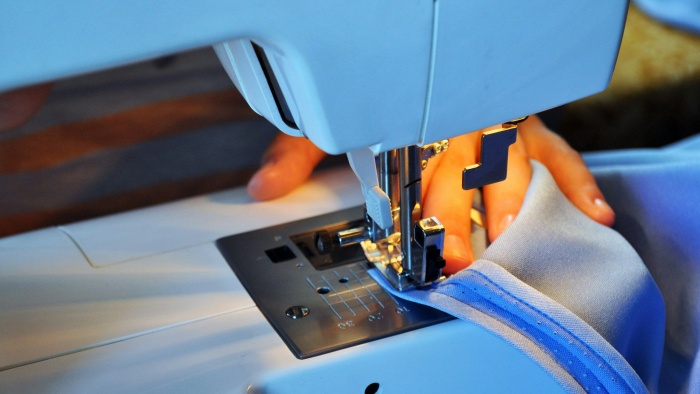
Aside from the basics like a sewing machine and scissors, consider if you need any special tools like fabric markers or a seam ripper for adjustments. Keep everything organized and within reach.
A well-organized workspace can greatly enhance your crafting experience, making it more enjoyable and less frustrating.
A template is your roadmap to a perfectly fitting cover. Use your measurements to draw out the shape of your portable bathtub cover on a large piece of paper or fabric.
This step requires attention to detail; an accurate template will save you from missteps later in the process.
It’s a blueprint that will guide your fabric cutting, ensuring that every piece aligns correctly for a professional-looking finish.
Now, it’s time to transfer your template onto your chosen fabric. Lay the fabric flat and pin your template securely in place.
When cutting, leave a small margin for seam allowances – this extra fabric will be crucial when you start sewing.
Precision in this step is key; a clean, accurate cut sets the stage for a neatly assembled cover. Think of this as sculpting the initial shape of your masterpiece.
With your pieces cut out, the next step is to bring them together into a cohesive cover for your portable bathtub. This phase is where your project really starts to take shape.
Start by sewing the larger pieces together, ensuring that the seams are aligned and the fabric is smooth. This is where your project begins to come alive.
Pay attention to the tension in your sewing machine to avoid puckering. This step requires patience and precision, as well-constructed seams are the backbone of your cover, ensuring durability and a neat appearance.
If your design includes zippers or Velcro, carefully sew them onto the fabric. Ensure that zippers glide smoothly and Velcro is securely attached. This functionality not only makes your cover more practical but also adds to its overall aesthetic.
Remember, these elements are not just functional; they also contribute to the design, so their placement and installation should be as meticulous as their selection.
This is where you refine your cover, making small adjustments and adding decorative elements. Consider double-checking the seams and trimming any loose threads for a clean finish.
This step is about perfecting your creation, adding those final touches that transform a simple cover into a stylish accessory for your portable bathtub.
Whether it’s a contrasting trim or a personalized patch, these details will make your cover uniquely yours.
Before you declare your project complete, it’s important to test the cover on your portable bathtub and make any necessary adjustments. This ensures that your cover is not only aesthetically pleasing but also practical and functional.
Now, the moment of truth. Place your newly crafted cover on your portable bathtub. Look for areas that may need adjustments. Does the cover fit snugly? Is it easy to put on and remove?
This practical test is vital to ensure your creation is not just visually appealing but also fully functional. If something’s not quite right, don’t be disheartened. Adjustments are a normal part of the crafting process.
Based on your test, you might need to tweak the size or reposition elements like zippers. Once the fit is perfect, think about personalization.
Maybe you want to add a monogram, or perhaps a decorative border. This is your opportunity to infuse your personality into the cover, making it a true representation of your style and creativity.
Creating a custom cover for your portable bathtub is a rewarding DIY project that adds functionality and style to your bathing experience.
By following these steps, you can craft a cover that not only protects your tub but also reflects your personal style.
Enjoy the satisfaction of using a cover you made yourself, and bask in the enhanced comfort and privacy it brings to your portable bathtub. Here’s to many relaxing and stylish baths in your newly adorned tub!
Can I incorporate heat-retention materials into my portable bathtub cover?
Absolutely! While the blog focuses on basic construction and design, adding heat-retention materials like insulated fabric can be a fantastic upgrade. This addition will help maintain water temperature, ensuring a warmer and more enjoyable bath.
How do I ensure my bathtub cover is mold-resistant?
To prevent mold and mildew, choose fabrics that are not only water-resistant but also have anti-microbial properties. Additionally, after each use, make sure to dry the cover completely in a well-ventilated area. Regular cleaning with mildew-resistant sprays can also be beneficial.
Is it possible to create a multi-functional cover that doubles as a bathroom mat or seating?
Yes, you can design your cover to be multi-functional. Use cushioned, waterproof materials, and ensure it’s sturdy enough to handle weight. This dual-purpose design can be a space-saver, especially in smaller bathrooms.
Are there eco-friendly material options for crafting the cover?
Indeed, there are several eco-friendly options, like recycled polyester or natural, untreated fabrics. These sustainable choices not only serve the purpose but also contribute positively to environmental conservation.
Can I add safety features to the cover, like non-slip surfaces?
Incorporating safety features is a great idea. Adding a non-slip surface to the underside of the cover can prevent it from sliding, making your bathing experience safer, especially when entering or exiting the bathtub.